Documentation Index
Fetch the complete documentation index at: https://docs.benchgen.com/llms.txt
Use this file to discover all available pages before exploring further.
How to Create an Action
This step‑by‑step guide shows how to add a new Action to one of your Topics.What Is an ActionAn Action is the executable capability a Topic can invoke to move from intent → real outcome. Where a Topic defines scope, guardrails, and behavioral rules, an Action is the concrete tool (API call, workflow, computation, retrieval, mutation) that actually does work.Multiple Topics can reuse the same Action (e.g., a generic customer lookup). Likewise a single Topic may orchestrate several Actions in sequence. Designing Actions as modular, well‑named, side‑effect‑clear units keeps agents predictable, debuggable, and auditable.
For deeper conceptual detail see: What is an Action
When to Create vs Reuse
Create a new Action if:- Side effects or API contract differ (new endpoint, new verb, different auth).
- Required inputs / outputs diverge meaningfully from existing ones.
- You need isolated monitoring or rollout control.
- Only the calling Topic logic changes, not the underlying operation.
- A minor additional optional field covers the delta.
How to Create an Action
-
Open My Agents & Select an Agent
Go to your Left Menu and click My Agents. Then click the agent you want to add an action to (opens its details).

-
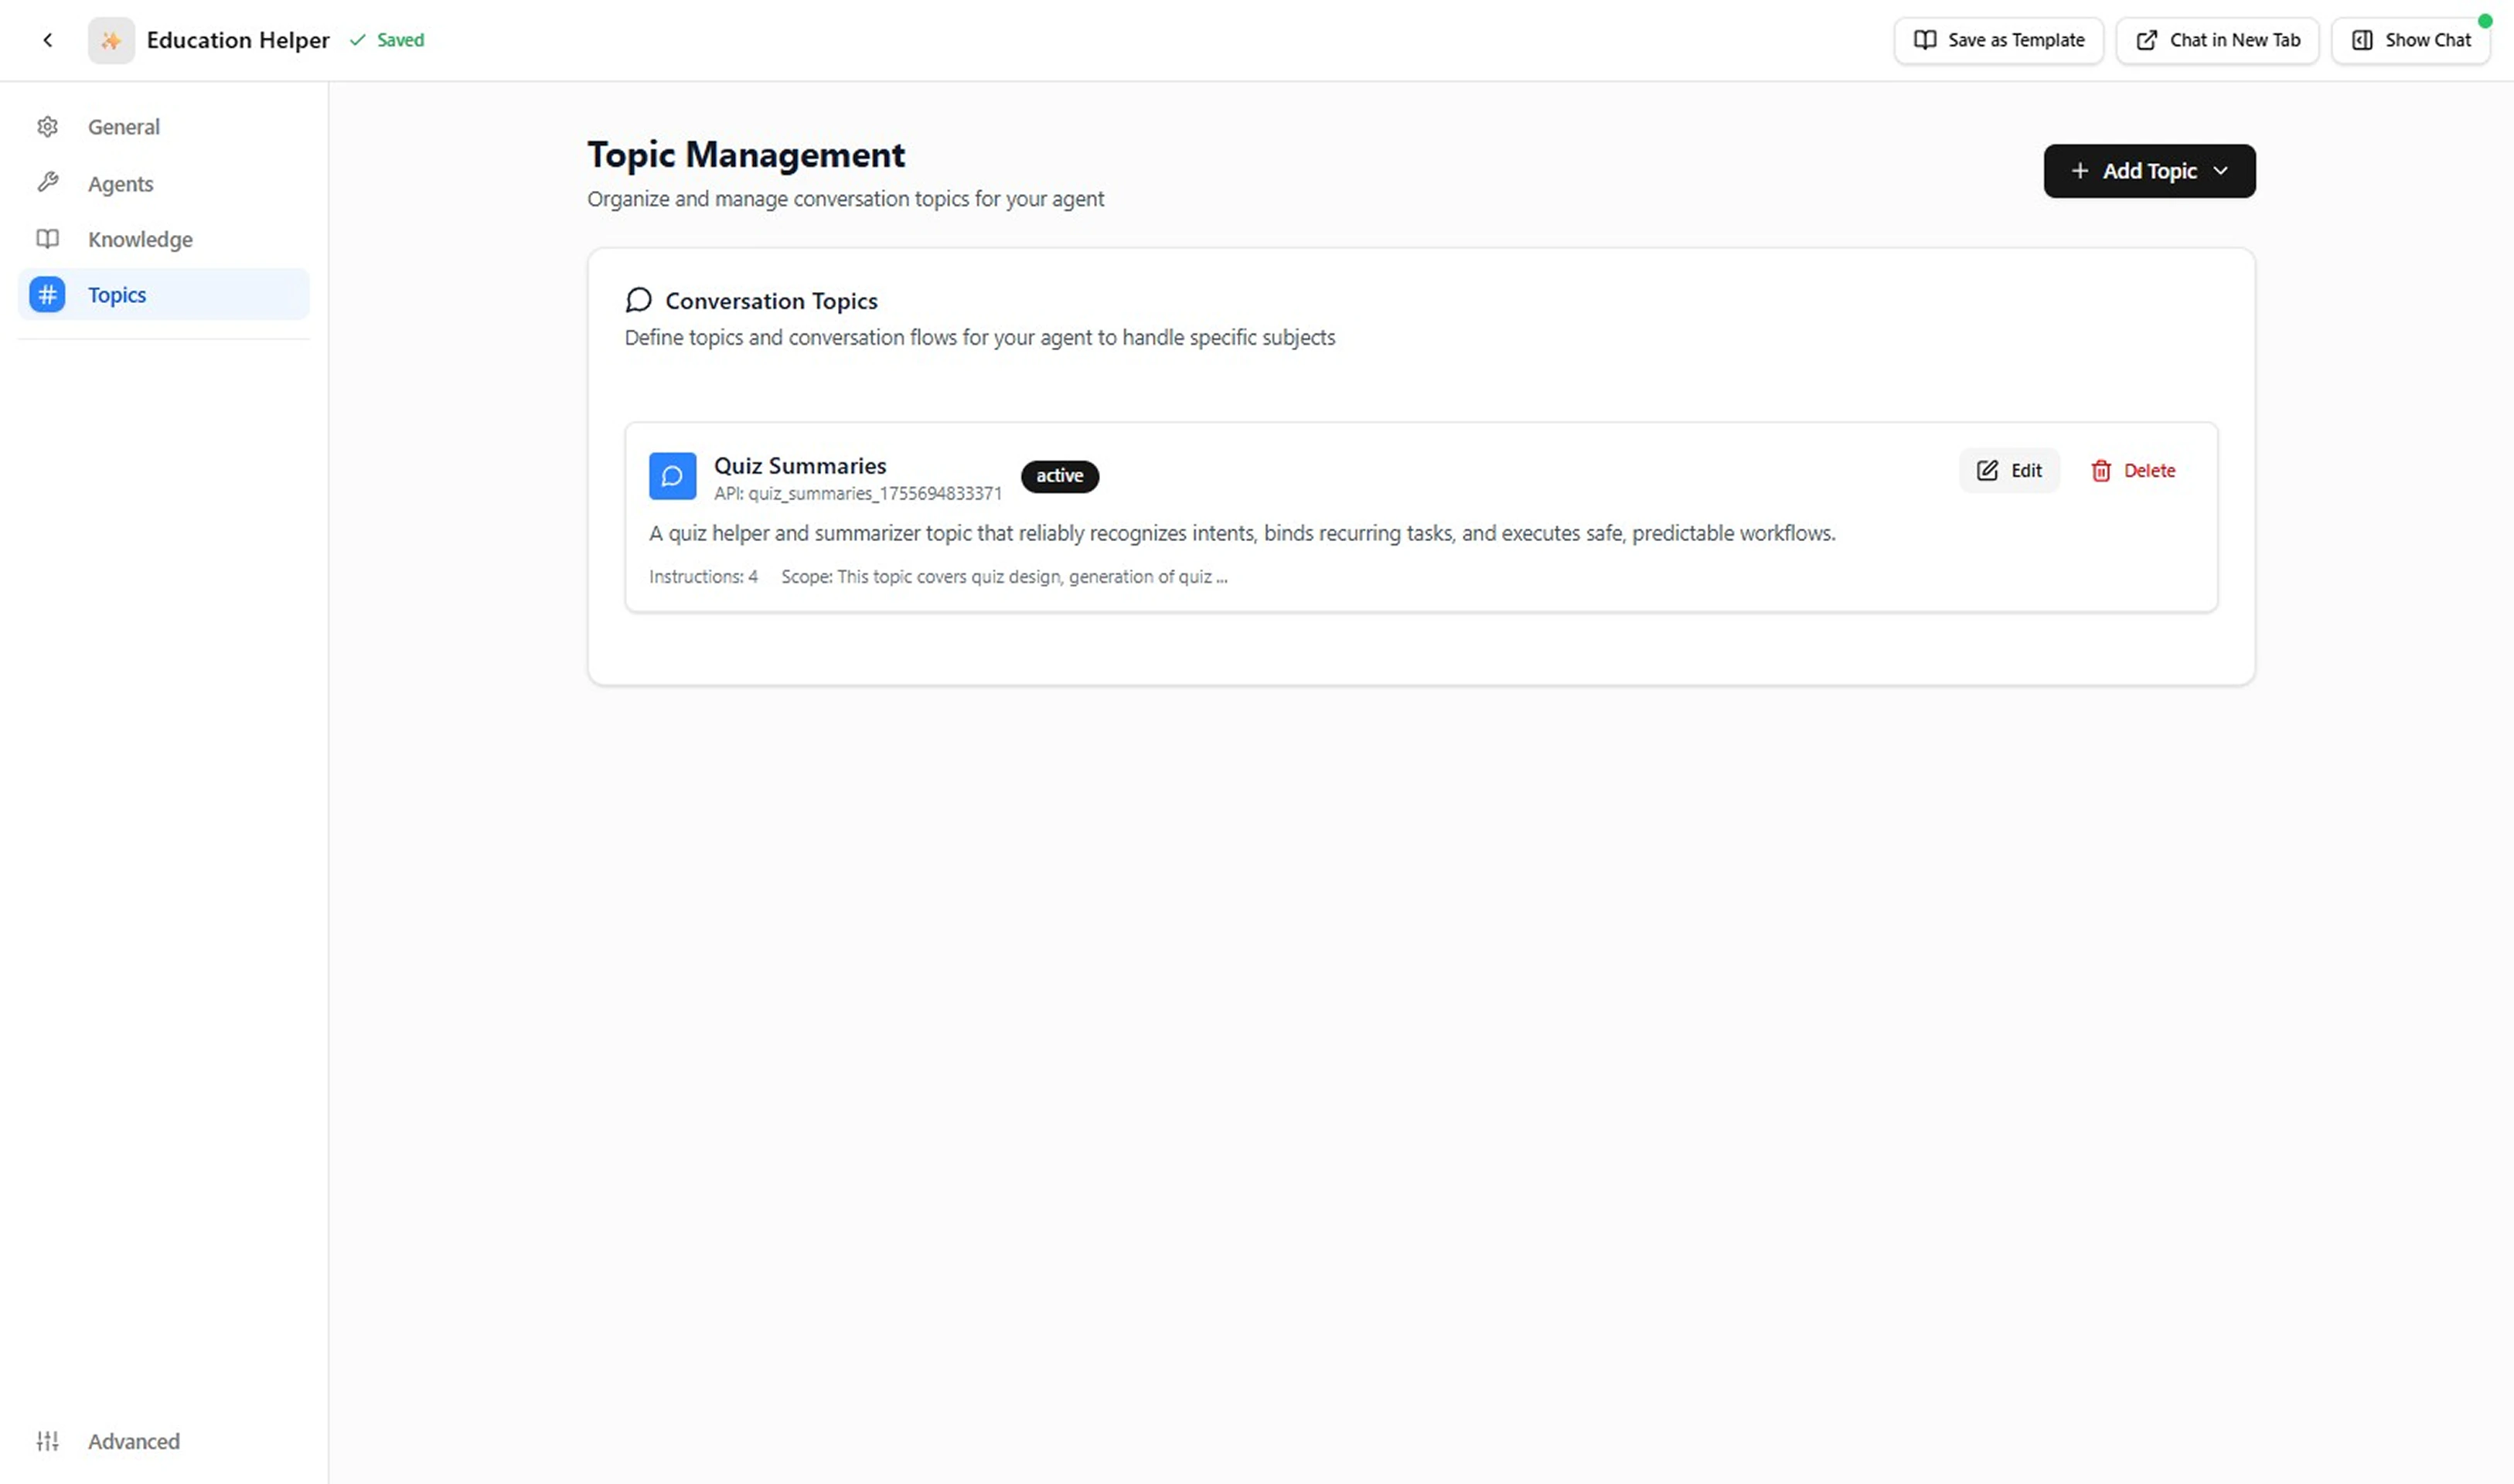
Open the Topics Tab
In the agent’s left menu, click Topics to view existing Topics.
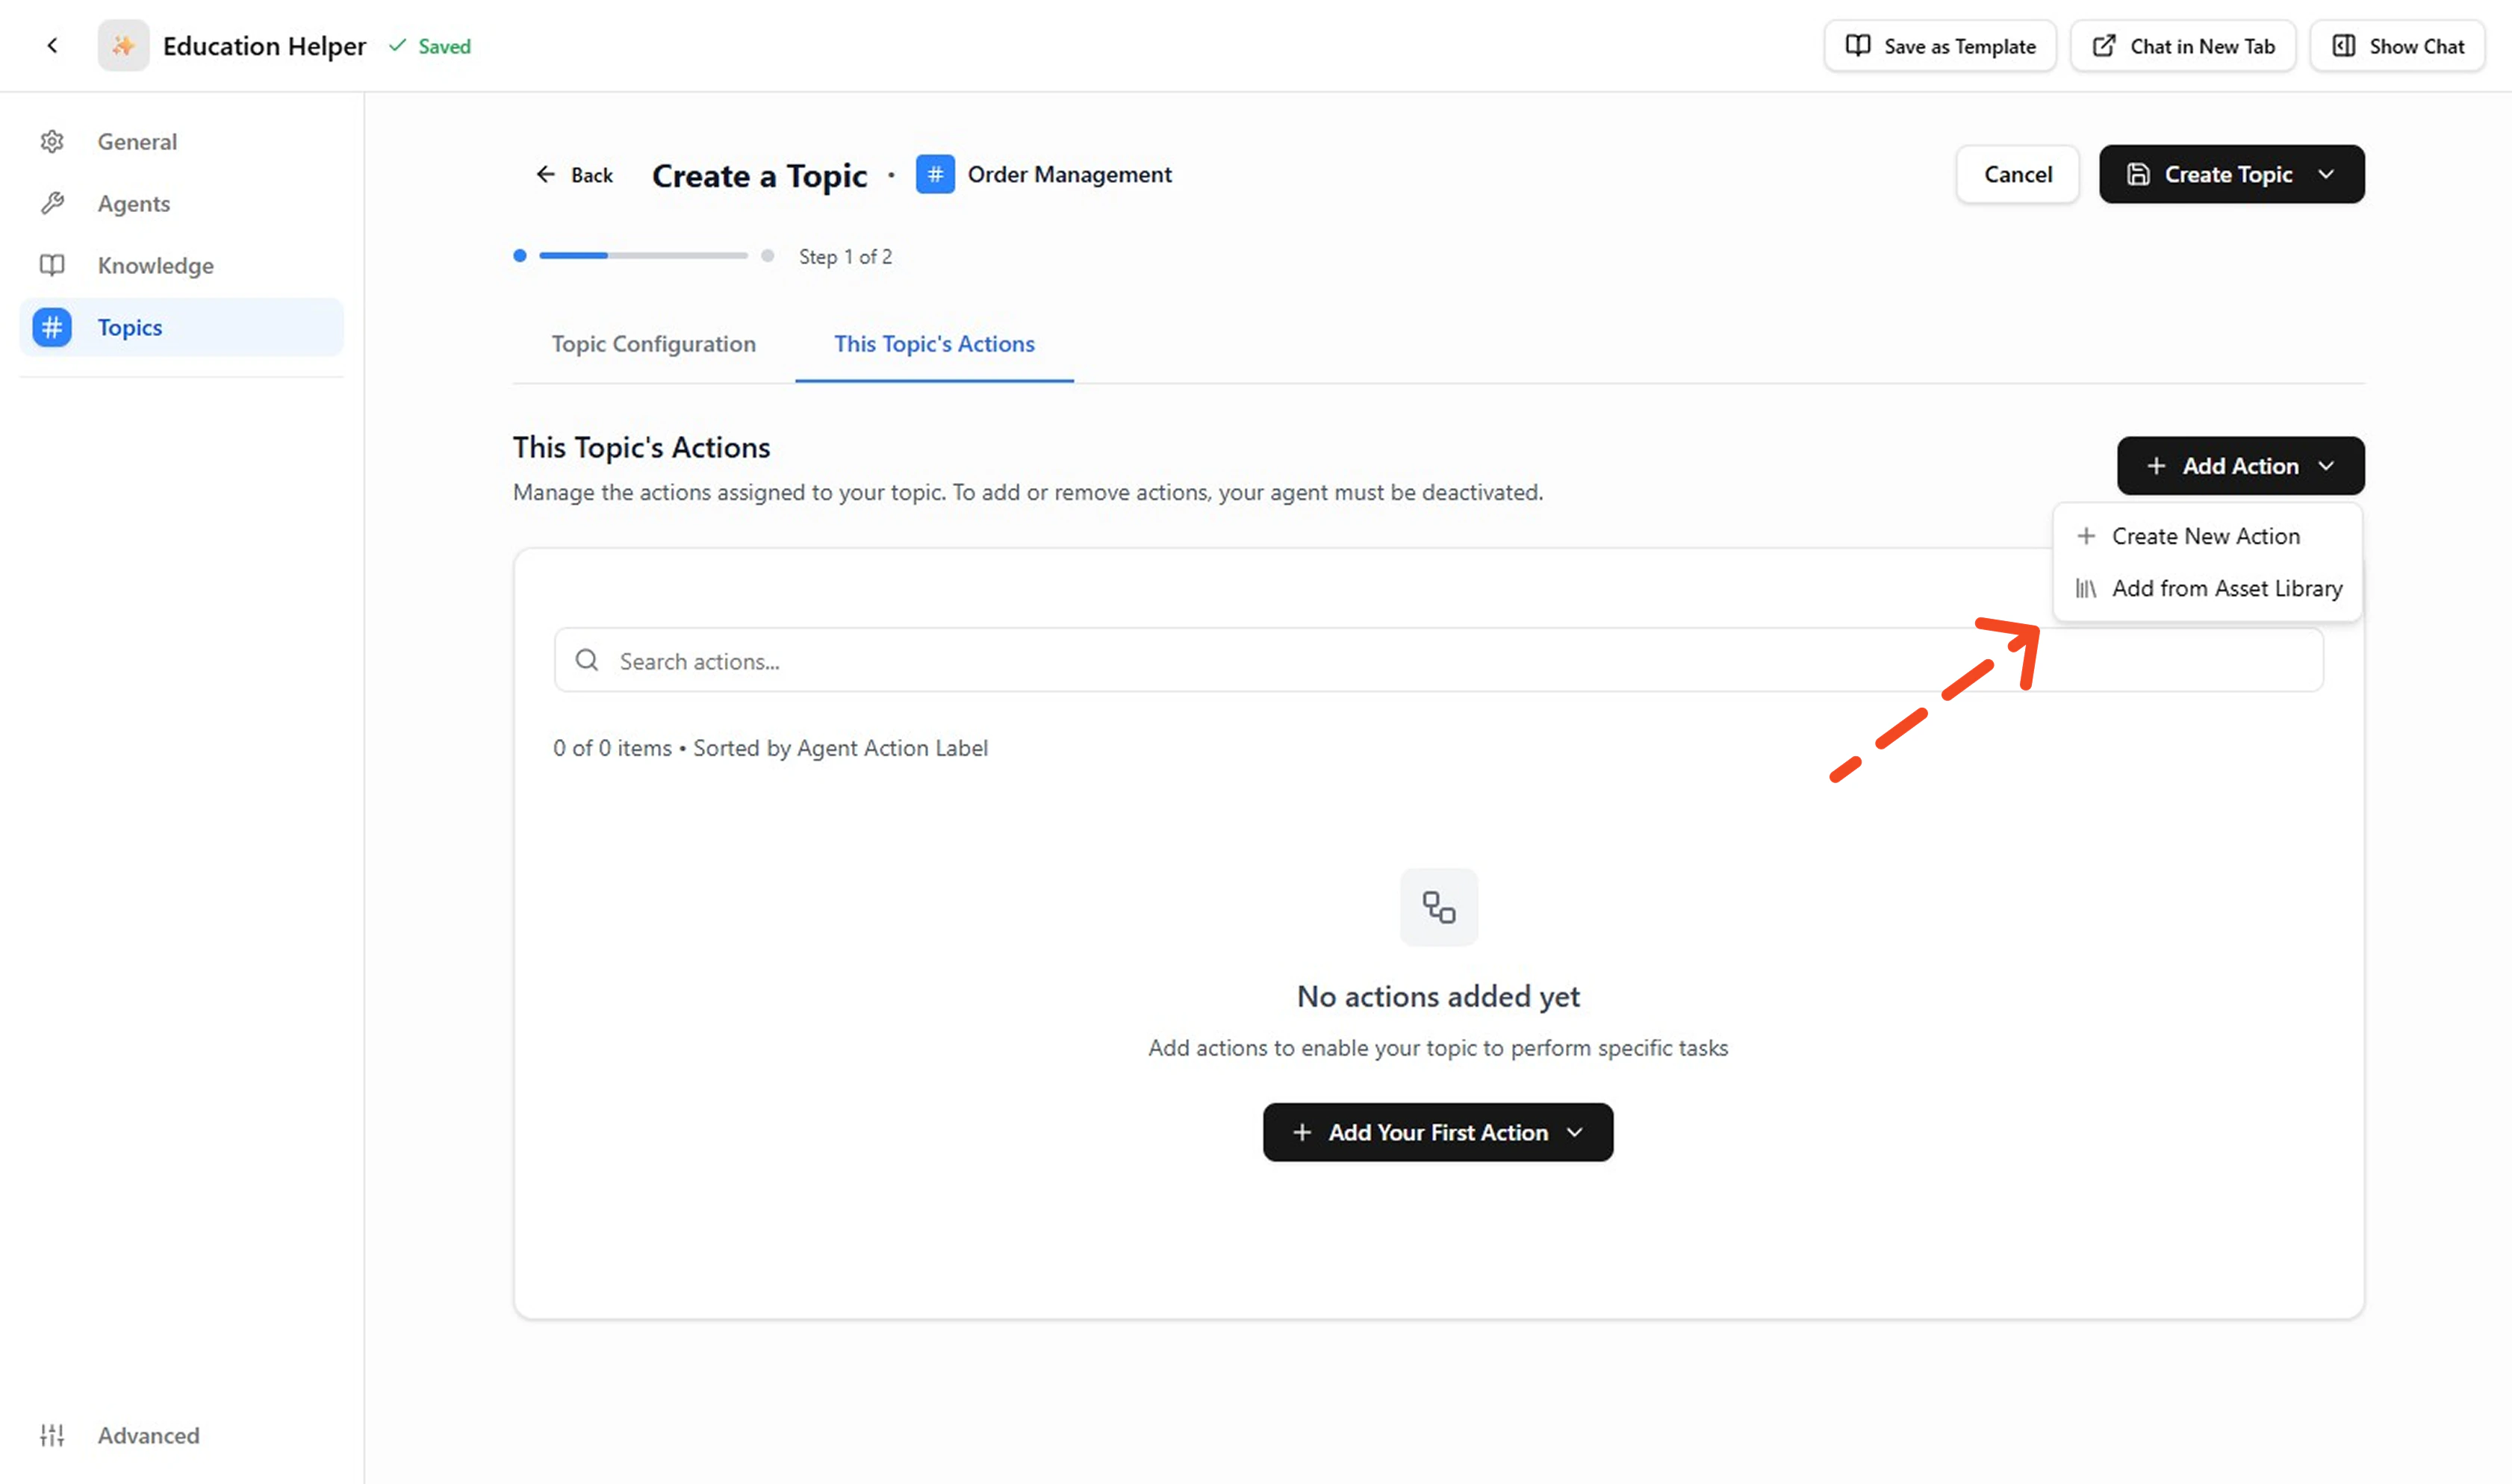
-
Open the Topic’s Actions
Click the Topic name, then open This Topic’s Actions to see any attached Actions.

-
Create a New Action
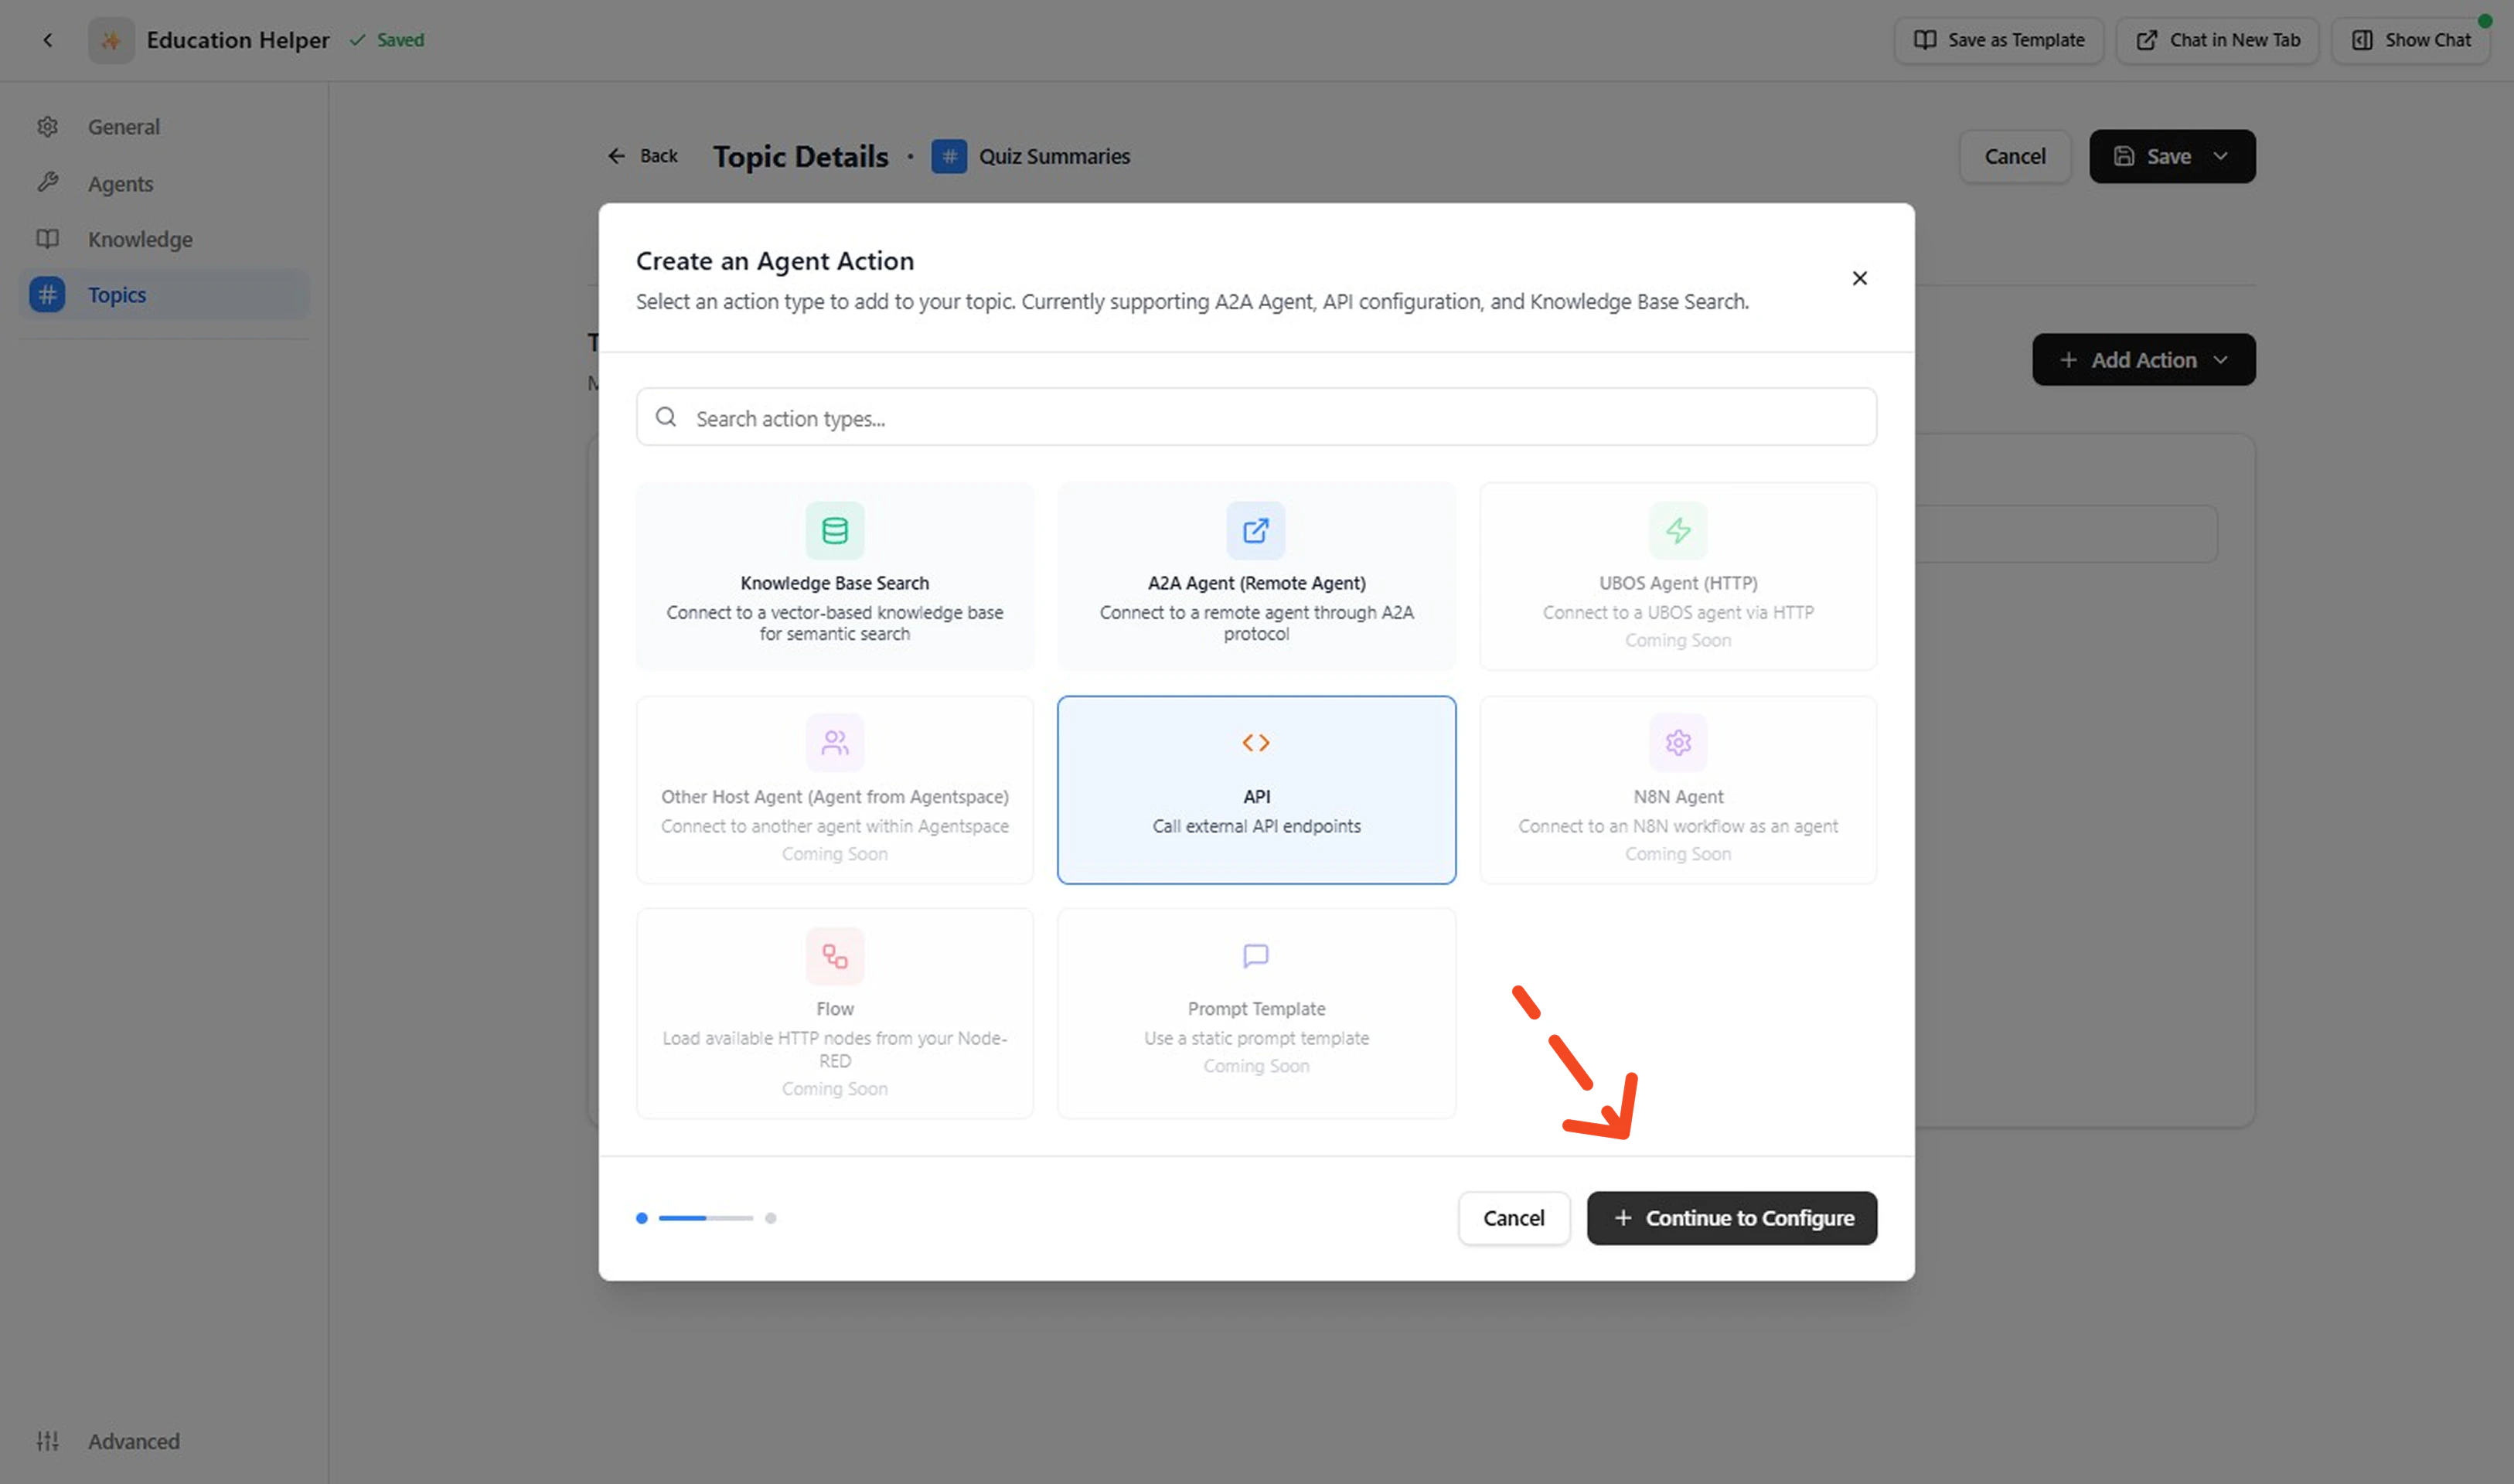
This page lists the Actions attached to the selected Topic. To add an Action: click + Add Action then click the + Create a New Action and proceed to configure the Action.

Create Your Own API Action
-
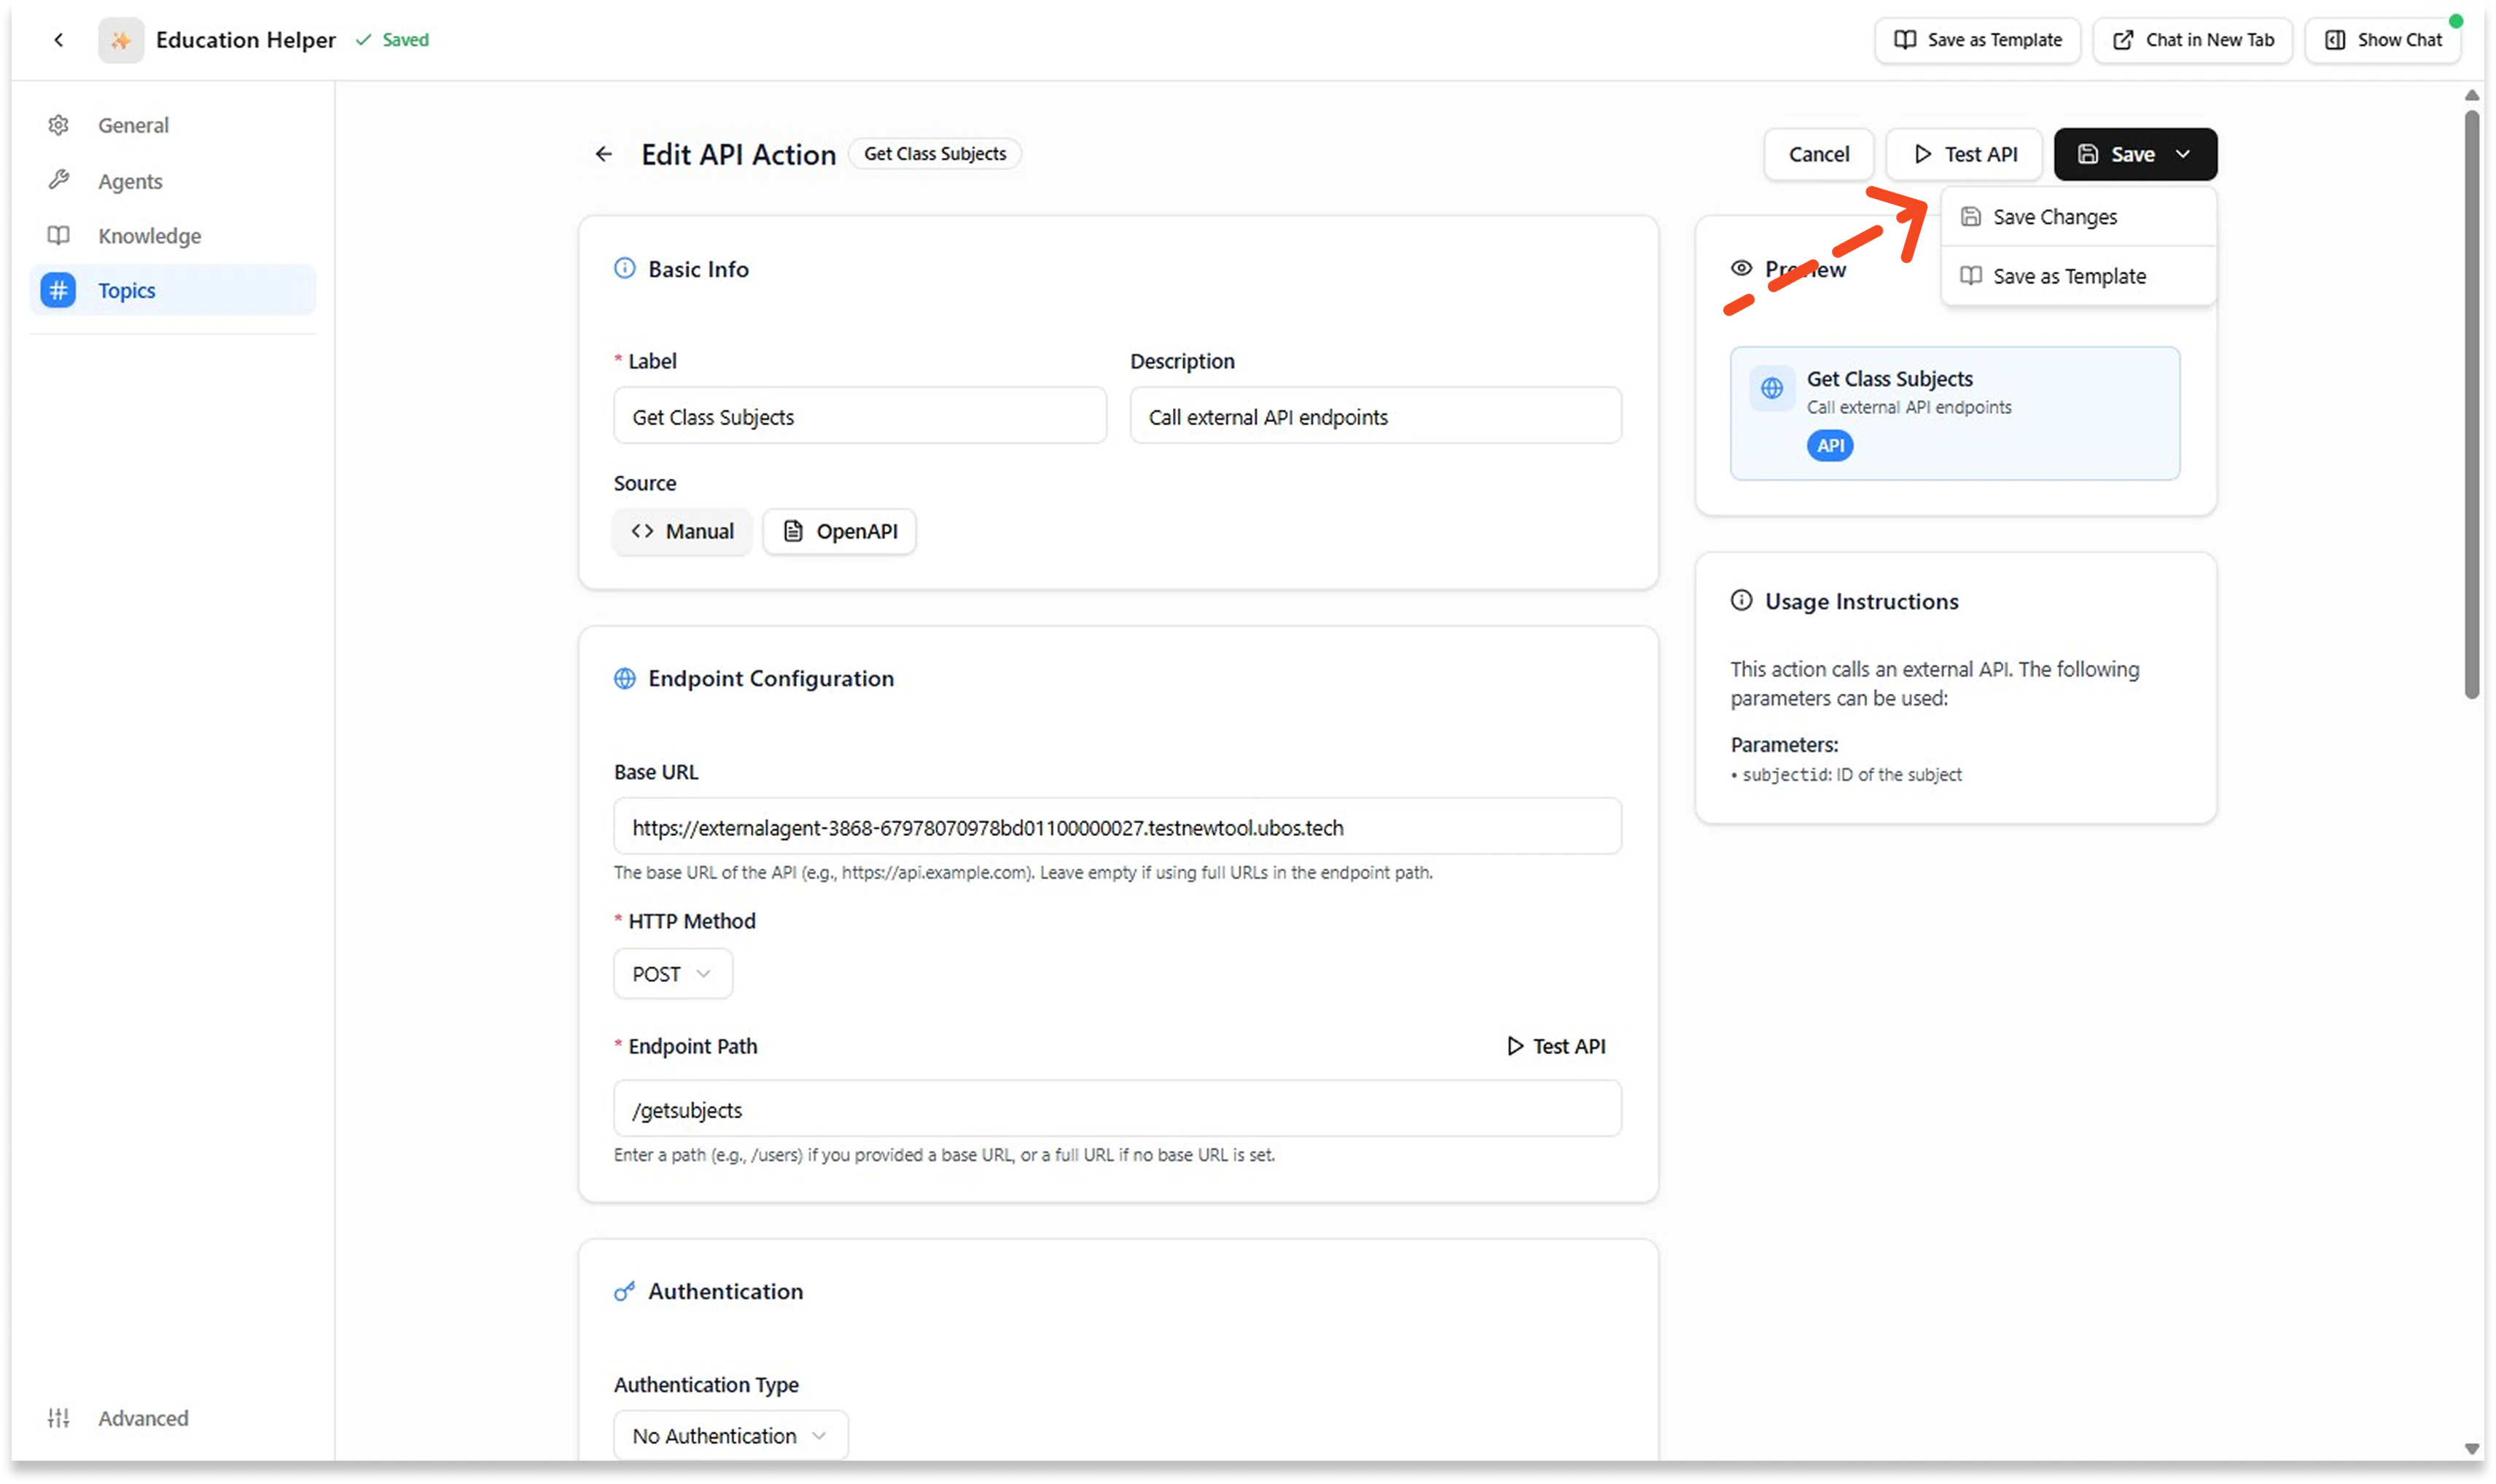
Fill Action Details
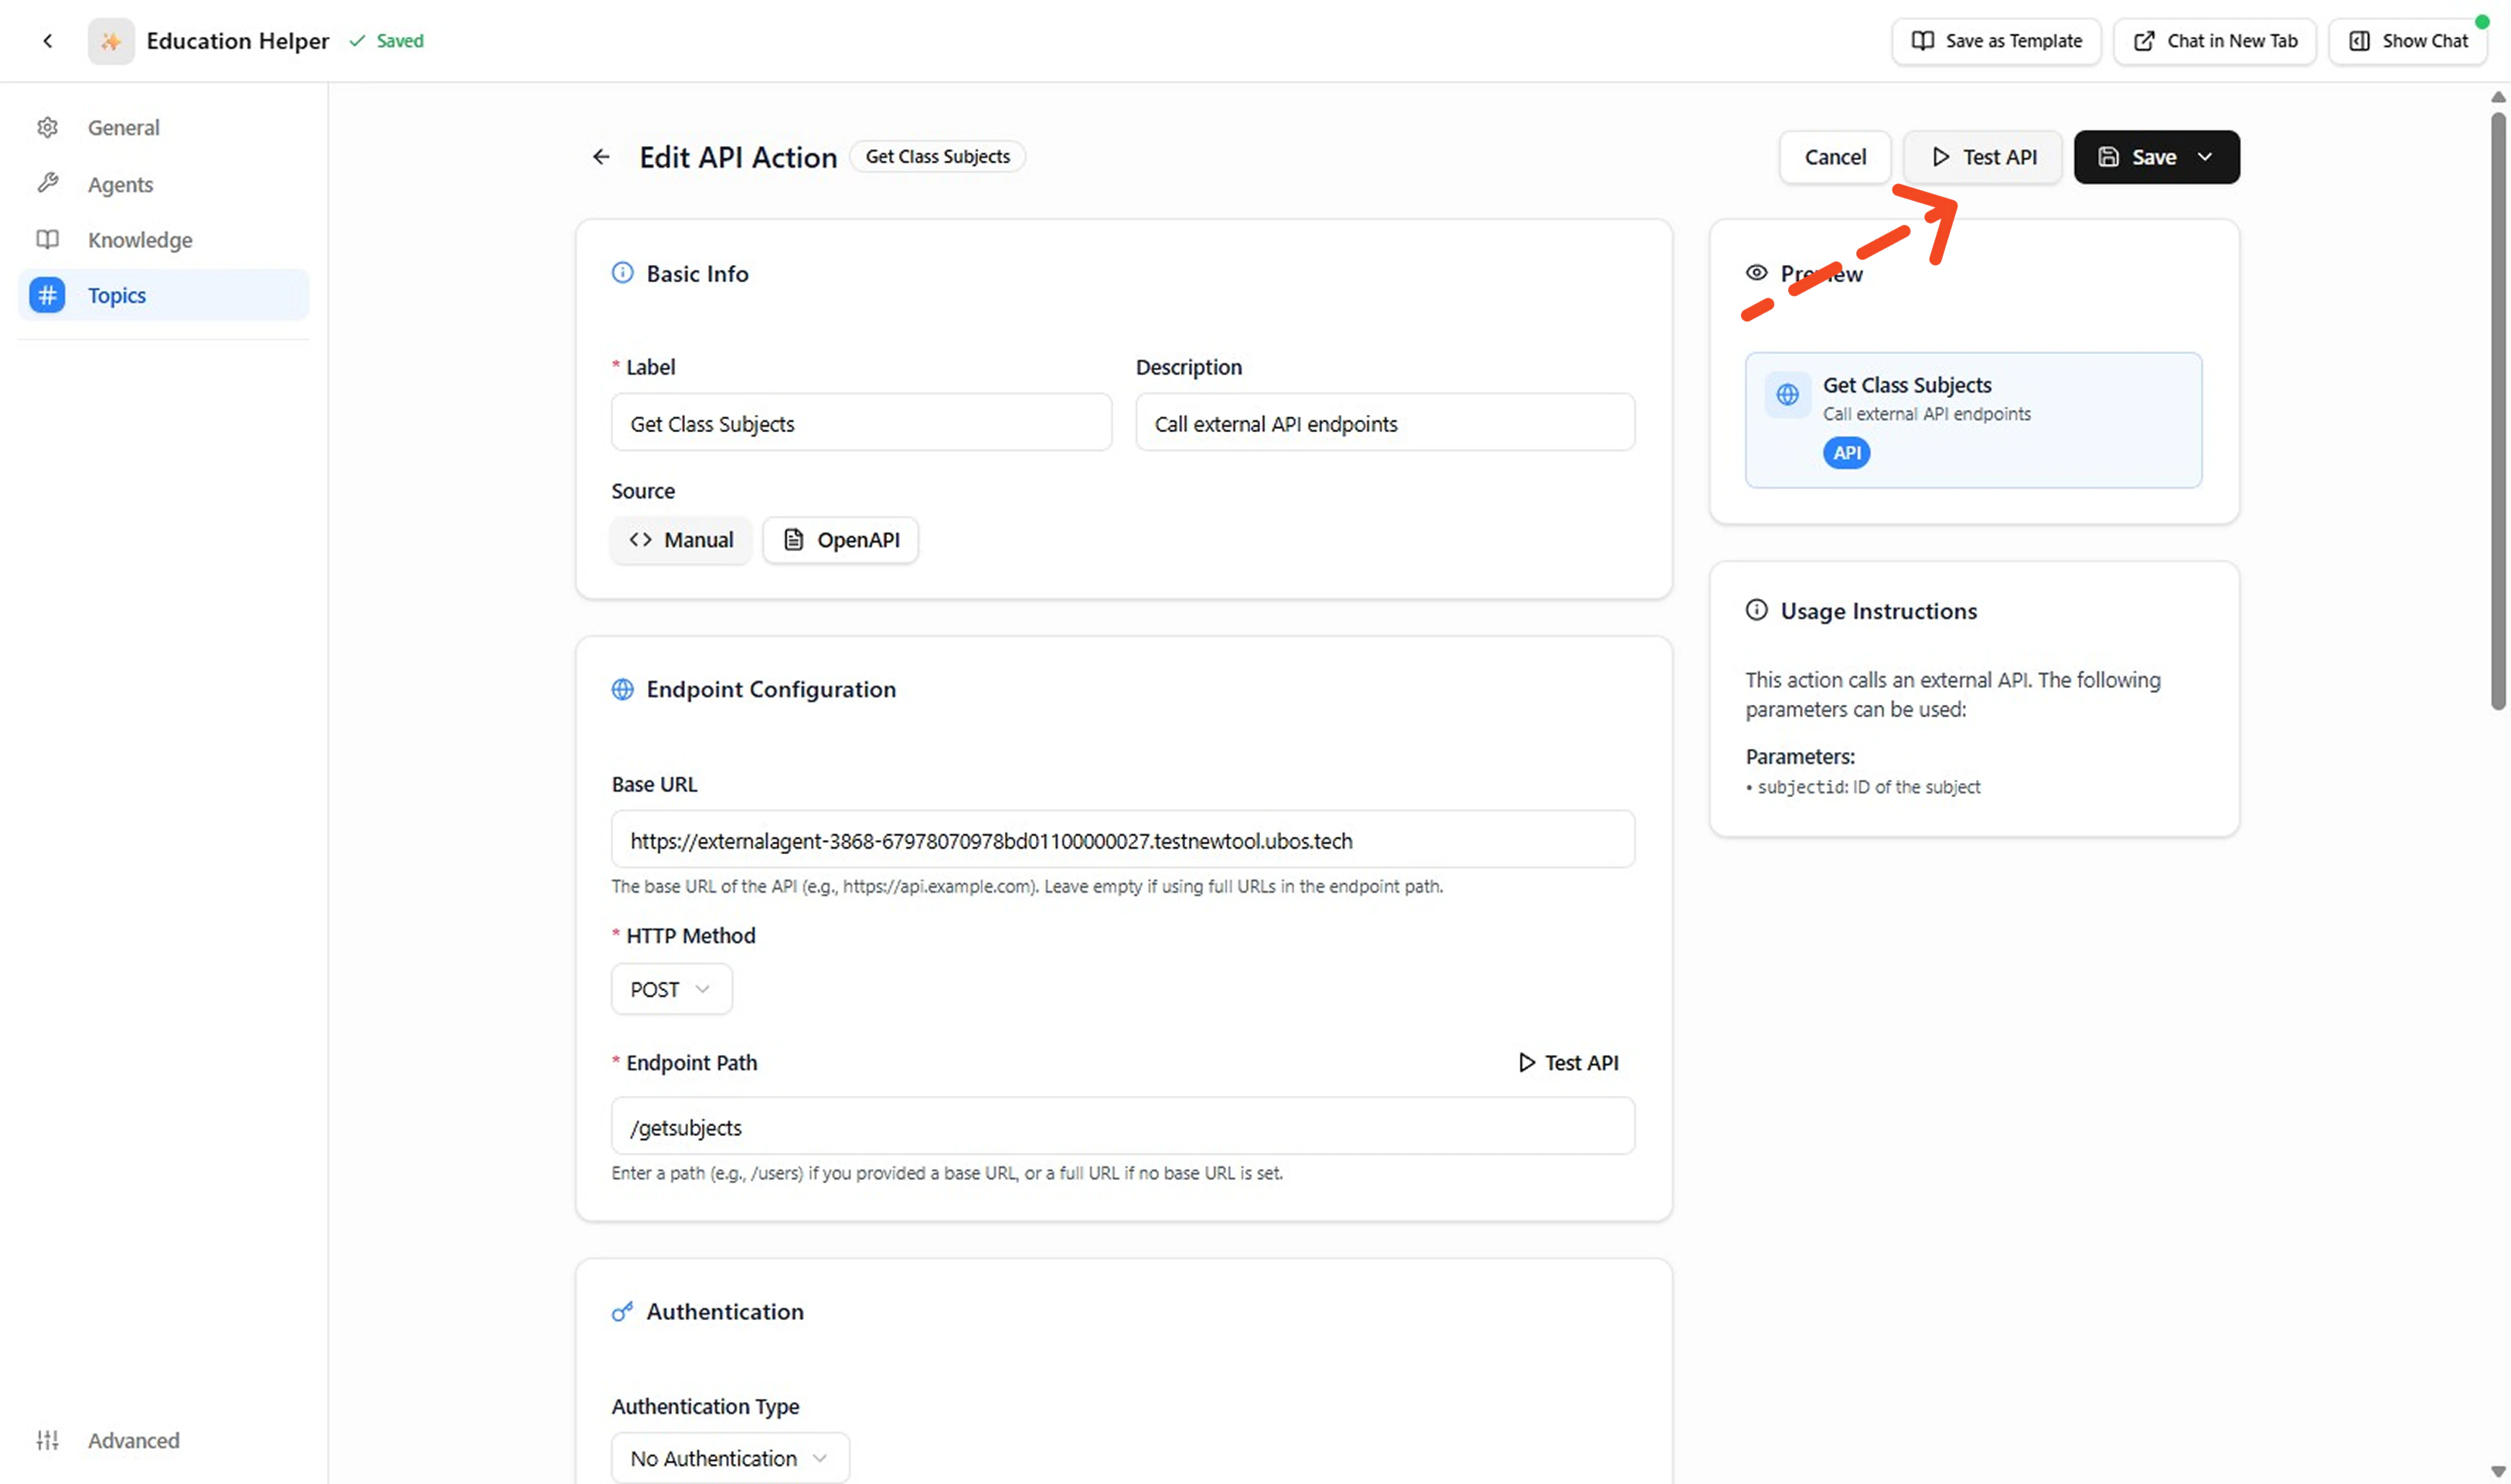
Select API action and click to Continue to Configure. Complete fields in each block: Basic Info, Endpoint Configuration, Authentication, Query Params, Custom Headers, Input Parameters, Output Schema, Advanced Settings. Keep labels short and outputs lean.
Field Example Notes Label Get Product DetailsClear verb + object. Description Call external API endpoints Refine later with disambiguator (e.g., “Returns name, price, availability”). Base URL https://external-agent-.../testenvcloudlabs.cnVersion / environment explicit. HTTP Method POSTMatches service contract (use GET if retrieval only). Endpoint Path /getproductNo trailing slash duplication. Authentication No Authentication (example) Replace with real auth when secured. Query Parameters (none) Add only if filtering needed. Custom Headers (none) Insert Accept: application/jsonetc. if required.Input Parameters productId(string, required)Single required key. Output Schema productDetails(string)Replace with structured fields when mapping added. Timeout 30secondsTune to API latency. Retries 0Increase only for idempotent calls. Error Handling Throw Error Fail fast for visibility. Response Mapping (empty) Add transform once response shape confirmed. -
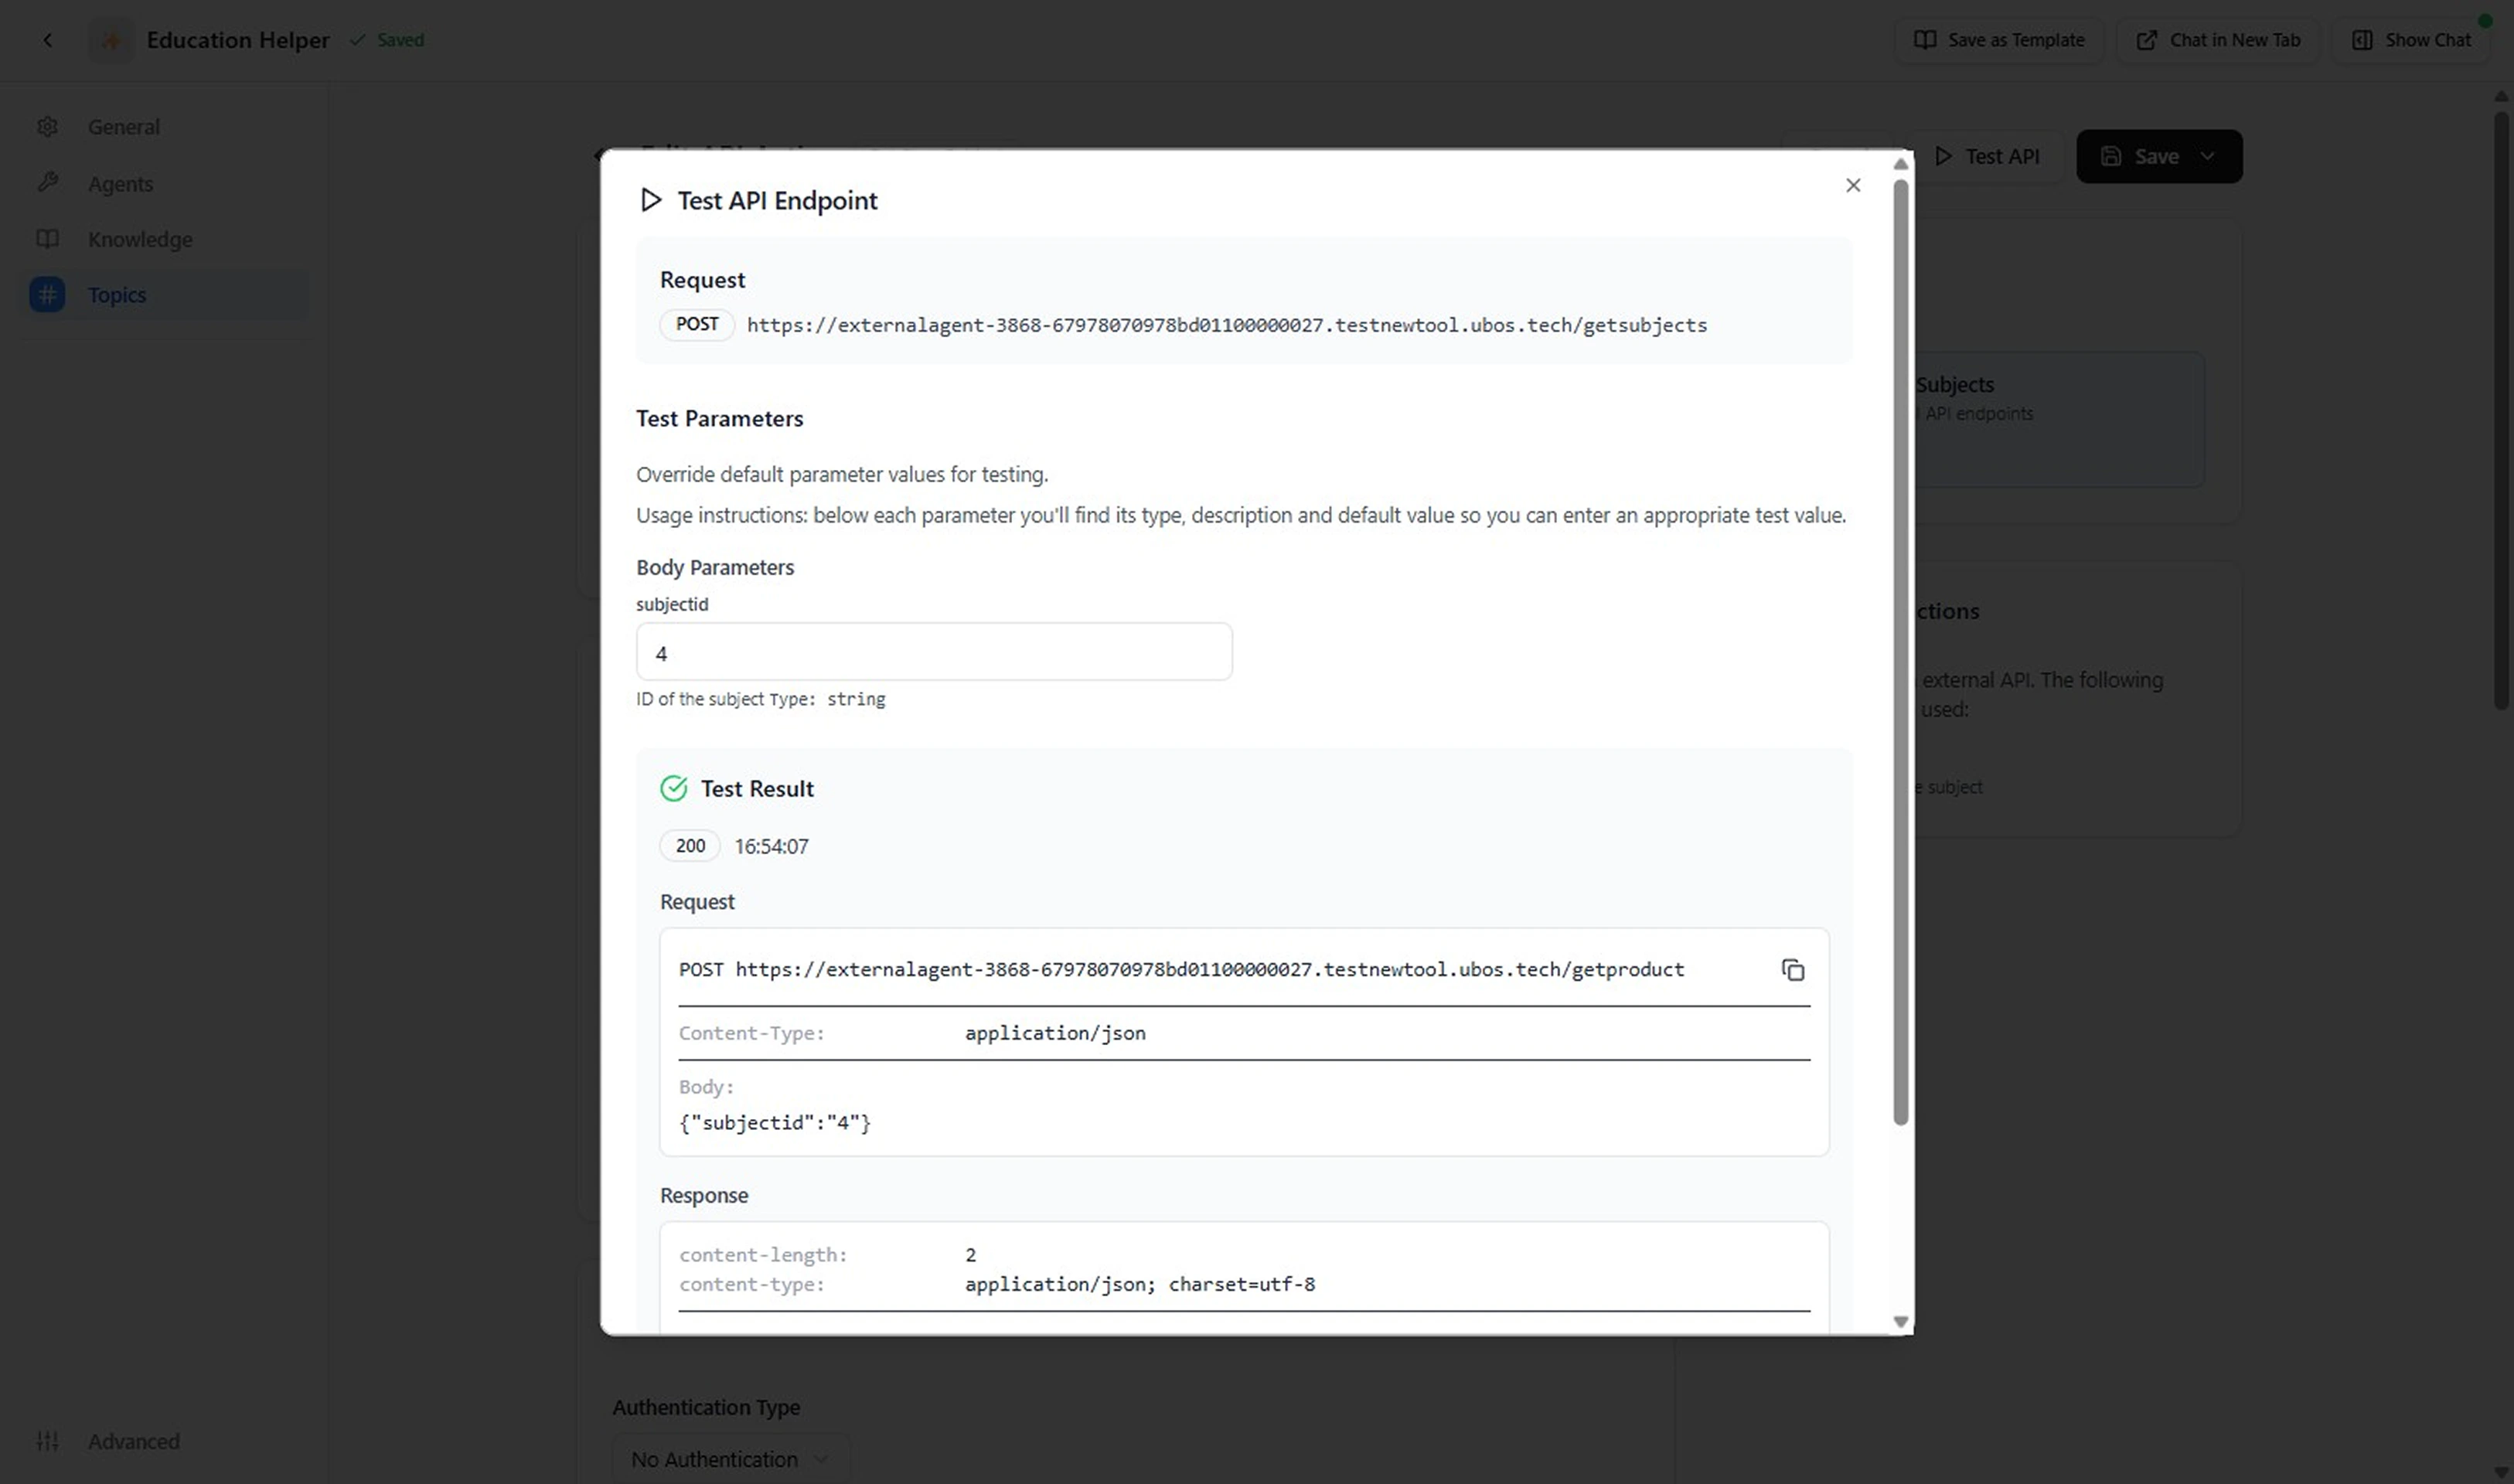
Test the API Action
Click Test API. Check assembled URL, method, headers, body, status code, and mapped outputs. Iterate until: correct status, expected latency, outputs populated, no secrets leaked.
-
Save the API Action
When satisfied, press Save.
- Validate in Chat Use the right‑side chat. Trigger phrases that should invoke the Action plus a phrase that should route elsewhere. Adjust Description if mis‑selected.
Use an Action Template
Leverage a pre-built template when your operation is common (lookup, list, status check) and you want speed + consistency.-
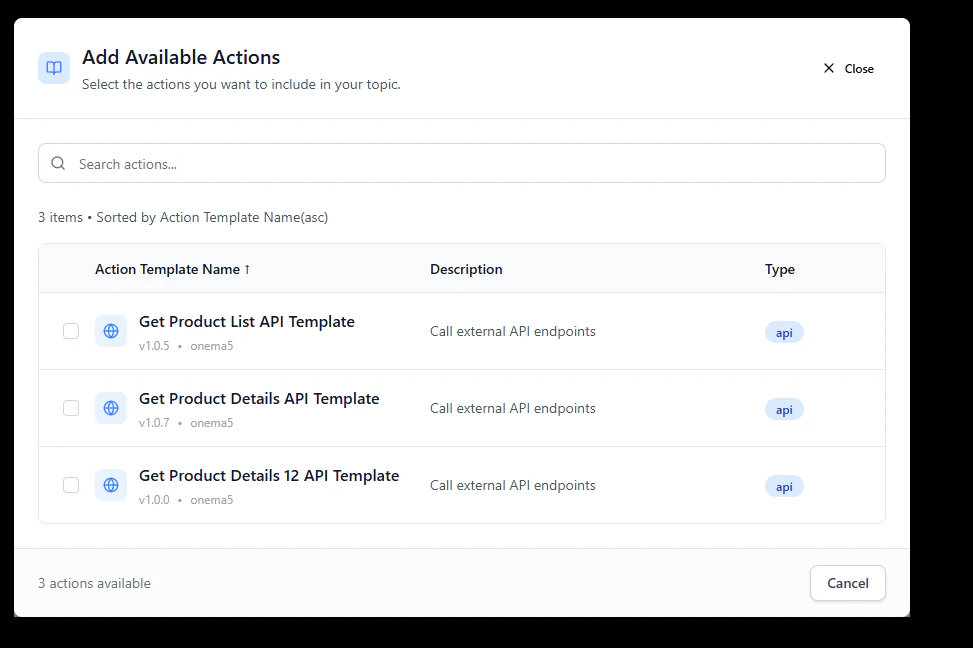
Access the Asset Library
Go to your Agent → Topics → open the relevant Topic → This Topic’s Actions → click Add from Asset Library.
- Browse and Search Templates Search or filter by keyword (product, order, quiz, invoice) to find relevant templates.
- Preview Template Details Review the template’s Label, Description, Inputs, Outputs, HTTP Method, Base URL/Path, Authentication, and Headers to ensure it matches your needs.
-
Select and Apply Template
Click one Template to clone the action into your Topic.
-
Customize Template Details
Modify ONLY what’s required:
- Ensure a unique label / API name (avoid collisions)
- Update auth to your secret reference
- Adjust Base URL / path placeholders
- Remove unused params & outputs
- Narrow the description (state one clear purpose)
- Provide Example Input JSON if absent
- Validate timeouts/retries for your API
- Test and Validate the Action Click Test API to verify assembled URL, method, headers, body, status code, and mapped outputs. Then Save and validate in chat to confirm the agent calls the correct action.
Testing Your ActionA passing test confirms: correct status code, expected response shape, and mapped output fields populated. If the test fails, check auth credentials, endpoint path, and input parameter formatting before retrying.
Done! You’ve created (or templated) an Action and hardened its definition.
Next Steps
- Browse reusable templates → Action Asset Library
- Back to concepts → What is an Action
- Back to topic guide → How to Create a Topic